I had all of the students bring in an object that belongs to
them that could fit into a plastic bowl.
I told them we would be pushing it into clay so it had to be able to get
dirty. Most of them brought small
toys.
We reviewed different types of fossils including preserved
organisms, impression fossils, and mineral replacement fossils. I showed them a few visual examples of each
and then we moved onto the hands-on activity.
We gave each student a small plastic bowl with a ball of
air-dry clay in it. I gave them
instructions to press the clay down flat and then push in their object with
enough pressure for the object to go about half-way down. After pushing it down, they lifted the
projects back out of the clay. I asked them
to identify what type of fossil the clay resembled. Most of them made the connection to
impression fossils. After doing that we
filled the impressions with plaster and let them dry for a week.
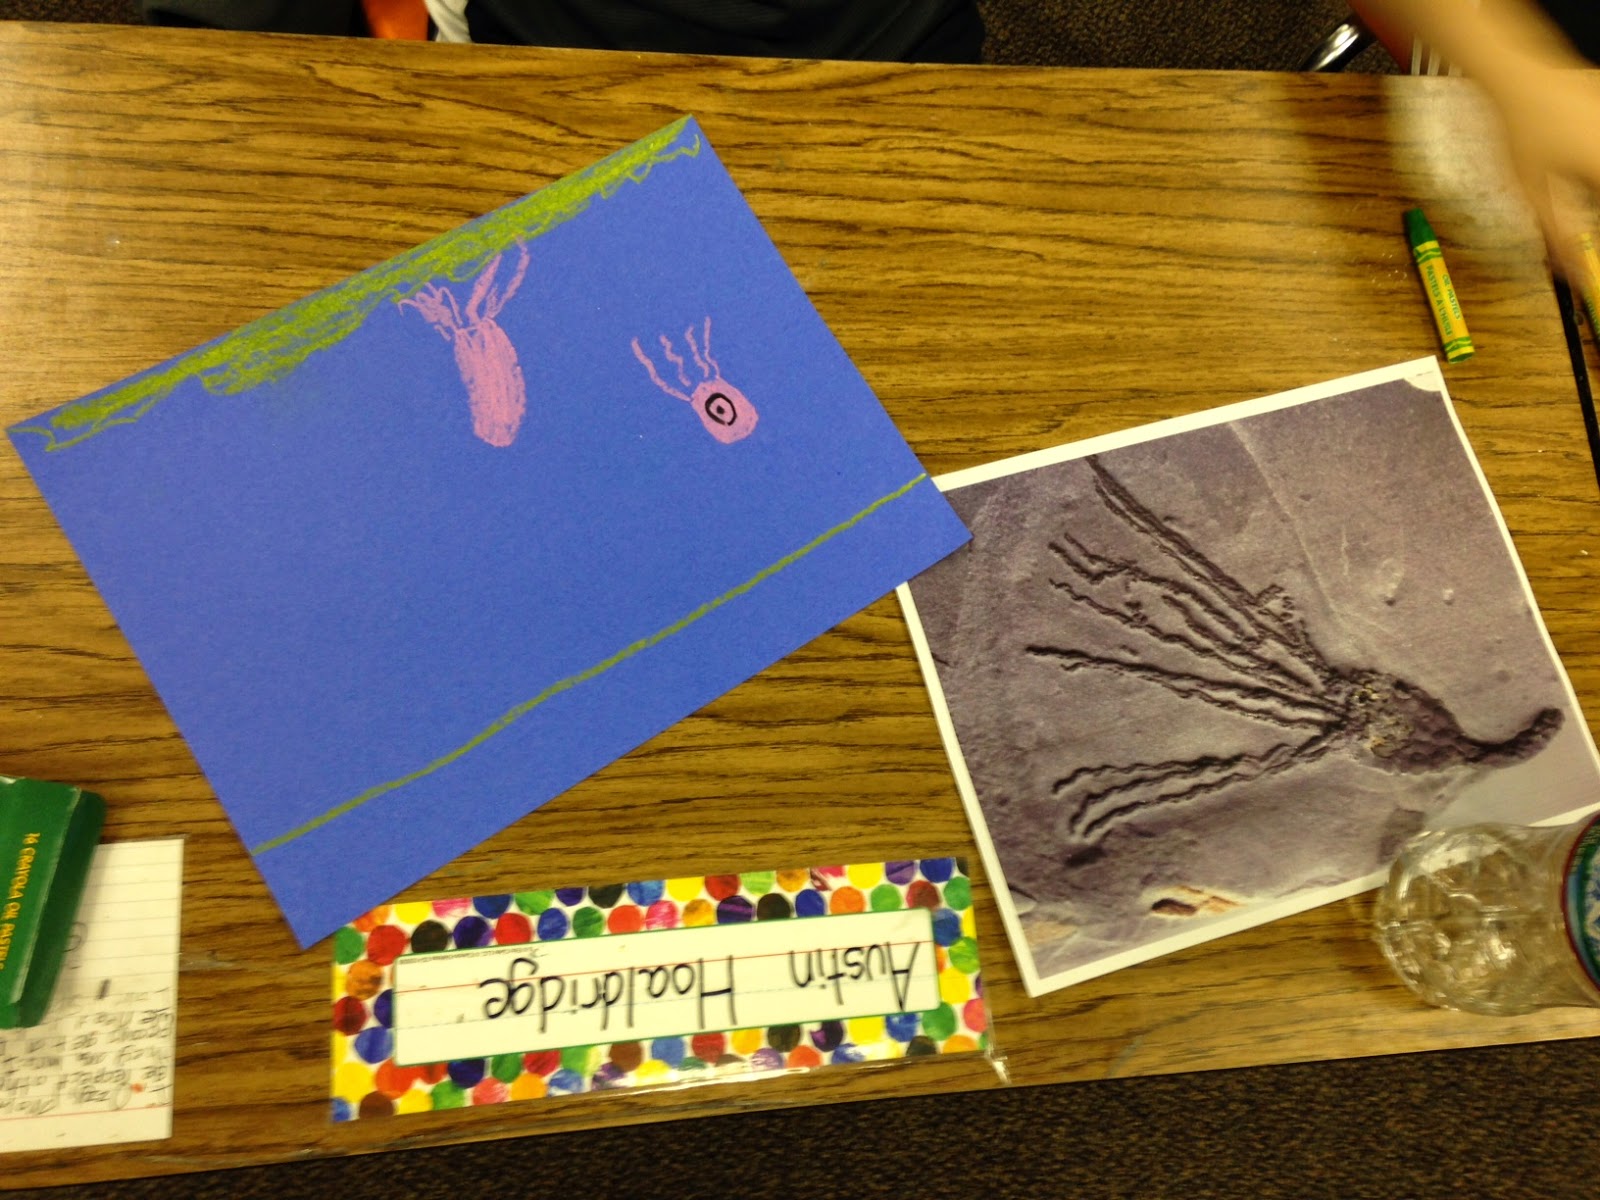
While Mrs. Gandara filled the bowls with plaster, I let the
students choose a fossil image from the back of the room. I showed them some examples of fossils like a
frog skeleton and plant and we described what these fossils might have looked
like as live organisms. Then I asked the
students to look at their fossils and imagine them in a prehistoric
environment. I showed them a few
examples of illustrations that infer what the environment and wildlife looked
like based off of scientific research. I
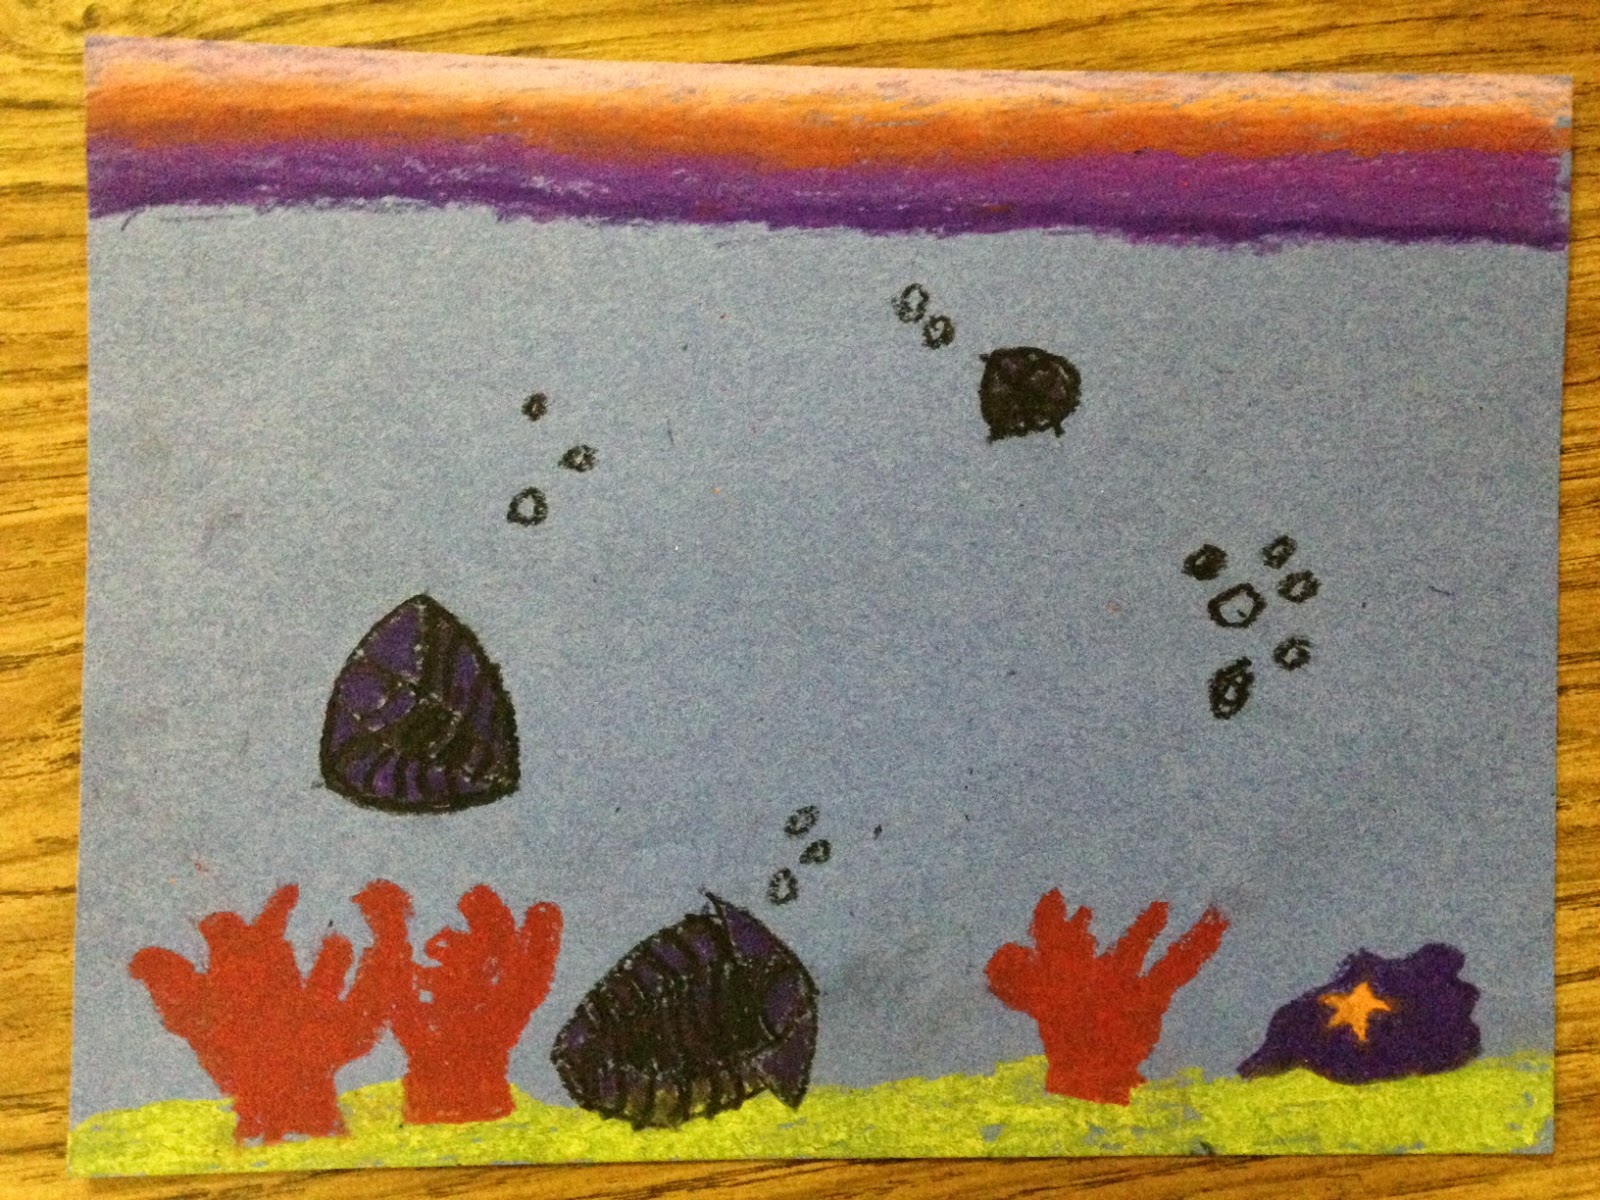
introduced some perspective drawing techniques like horizon lines, aerial
perspective, and the scale and location of objects on the paper. I showed them some more prehistoric
illustrations and asked the students to point out the techniques being used. Most of them could recognize the aerial
perspective and the horizon lines, etc.
I did a demonstration of how to utilize these techniques with oil pastels
on construction paper and then gave the assignment to draw their fossil as if
it were alive. These were the
requirements:
·
Draw a landscape with the type of environment
that you think your organism would have lived in.
·
Include a horizon line
·
Draw your fossil organism 3 times in 3 different
sizes going up the page to create the illusion of depth.
I wish I had written these three requirements on the board
or something, but I didn’t think to do it in the moment. About half of the students remembered the
instructions. I was still pleased with
the outcome. Some of the students
finished their first drawing early and started a second one that had a little
bit more creative flare.


.JPG)
.JPG)


.JPG)


.JPG)


Fossils and Art
Name
of Art Scholar: Rachel Jackson
Name
of Teacher: Jayme Gandara
Subject Concepts
|
Art Concepts
|
|
Content
Covered: Fossils
|
Content
Covered: Landscapes, perspective,
|
|
State Standards & Objectives (USOE/UEN):
Standard 4, Objective 1
Impression/Tracks and
Mineral Replacement
a.Identify features of fossils that
can be used to compare them to living organisms that are familiar (e.g.,
shape, size and structure of skeleton, patterns of leaves).
b.
Describe three ways fossils are formed in sedimentary rock
(i.e., preserved organisms, mineral replacement of organisms, impressions or
tracks).
|
State
Standards & Objectives (USOE/UEN):
Standard
2,Objective 1
a.
Discuss how
height placement creates an illusion of depth in artworks.
d. Identify evidence of depth, shadow, color, and mood in
artwork.
Objective
2
a. Draw the base of a distant object higher up on the drawing
page than the bases of objects that are meant to be in the foreground.
Standard 3,
Objective 2
a. Create a work of art using inspiration from hobbies
or interests
|
|
Learning
Outcomes:
·
The student will be able to identify fossil features and compare
them to living organisms by drawing a landscape that incorporates prehistoric
wildlife.
·
The student will be able to identify preserved organisms, mineral
replacement of organisms, and impression fossils by imitating the different
fossils types with clay and plaster.
|
Learning
Outcomes:
·
The student will be able to draw a landscape using perspective
techniques such as creating depth through height placement, shading, and the
location of objects within the page.
·
The student will create a fossil that preserves an artifact from his
or her own life.
|
|
Lesson Plan
|
||
Objectives:
Assessments:
|
||
Materials
Needed:
Vocabulary:
|
Lesson
Sequence:
Day
1:
1. Draw a
landscape with the type of environment that you think your organism would
have lived in.
2. Include a
horizon line
3. Draw your
fossil organism 3 times in 3 different sizes going up the page to create the
illusion of depth.
(45 minutes)
Day 2:
1.
Describe what your fossil looks like from
an aliens perspective.
2.
Explain what it was used for from an
aliens perspective.
|
|
No comments:
Post a Comment